How to design a campaign using TRIAL mode ?
Prerequisites
- Have familiarized with TRIAL mode through the General Presentation section.
- Have subscribed to a Contextual TRIAL mode offer and obtained your ID/password.
- Have Experimenter privileges.
Let's design my trial !
- Step 1 : Access the Trial section, and click "Create new trial". A pop-up appears where you choose a name and set the start and end dates. You can also duplicate an existing trial.
ℹ️ Start date defines the beginning of your trial schedule and sets the start of the event calendar that will be planned within the trial. Choose it carefully. The time of the selected start date is assumed to be 00:00 .
ℹ️ Once created, the trial appears with the status Preparing. In this state, it can be edited freely and is not yet available to participants.
- Step 2 : In the [Schedule] tab, you can add, edit, and schedule sequences. Click "New Sequence" to create one or edit an existing sequence.You can also duplicate an existing sequence.
ℹ️ A sequence is a set of actions performed by participants. To launch a trial, at least one planned sequence is required. Choose its name carefully, as it will be displayed in the participants’ schedule.
- Step 3 : Edit your sequence by adding at least one action.
ℹ️ An action is a step within a sequence that the participant will perform. It can be either a question or a measurement. When there are multiple actions, you can organize them by dragging and dropping the tiles.
You can add the following actions:

New Question: ask anything, either as a multiple-choice question (where you specify the possible answers) or as an open-ended question.

New Measure: Adding a measure means specifying a sensor setup. Select the sensor that the participant will use and configure all its parameters. For more information about the sensor setup fields, refer to the sensor descriptions in the Sensors section. Additionally, you can upload a PDF document, which will be displayed in the participant’s mobile app during the measurement. For example, this could be a PDF with detailed information about the sensor or your measurement protocol.

New Indication: Use an indication to give instructions, information, or a brief introduction to the sequence. For example, if you want to add a few words of context before the sequence, choosing an indication is the right option.
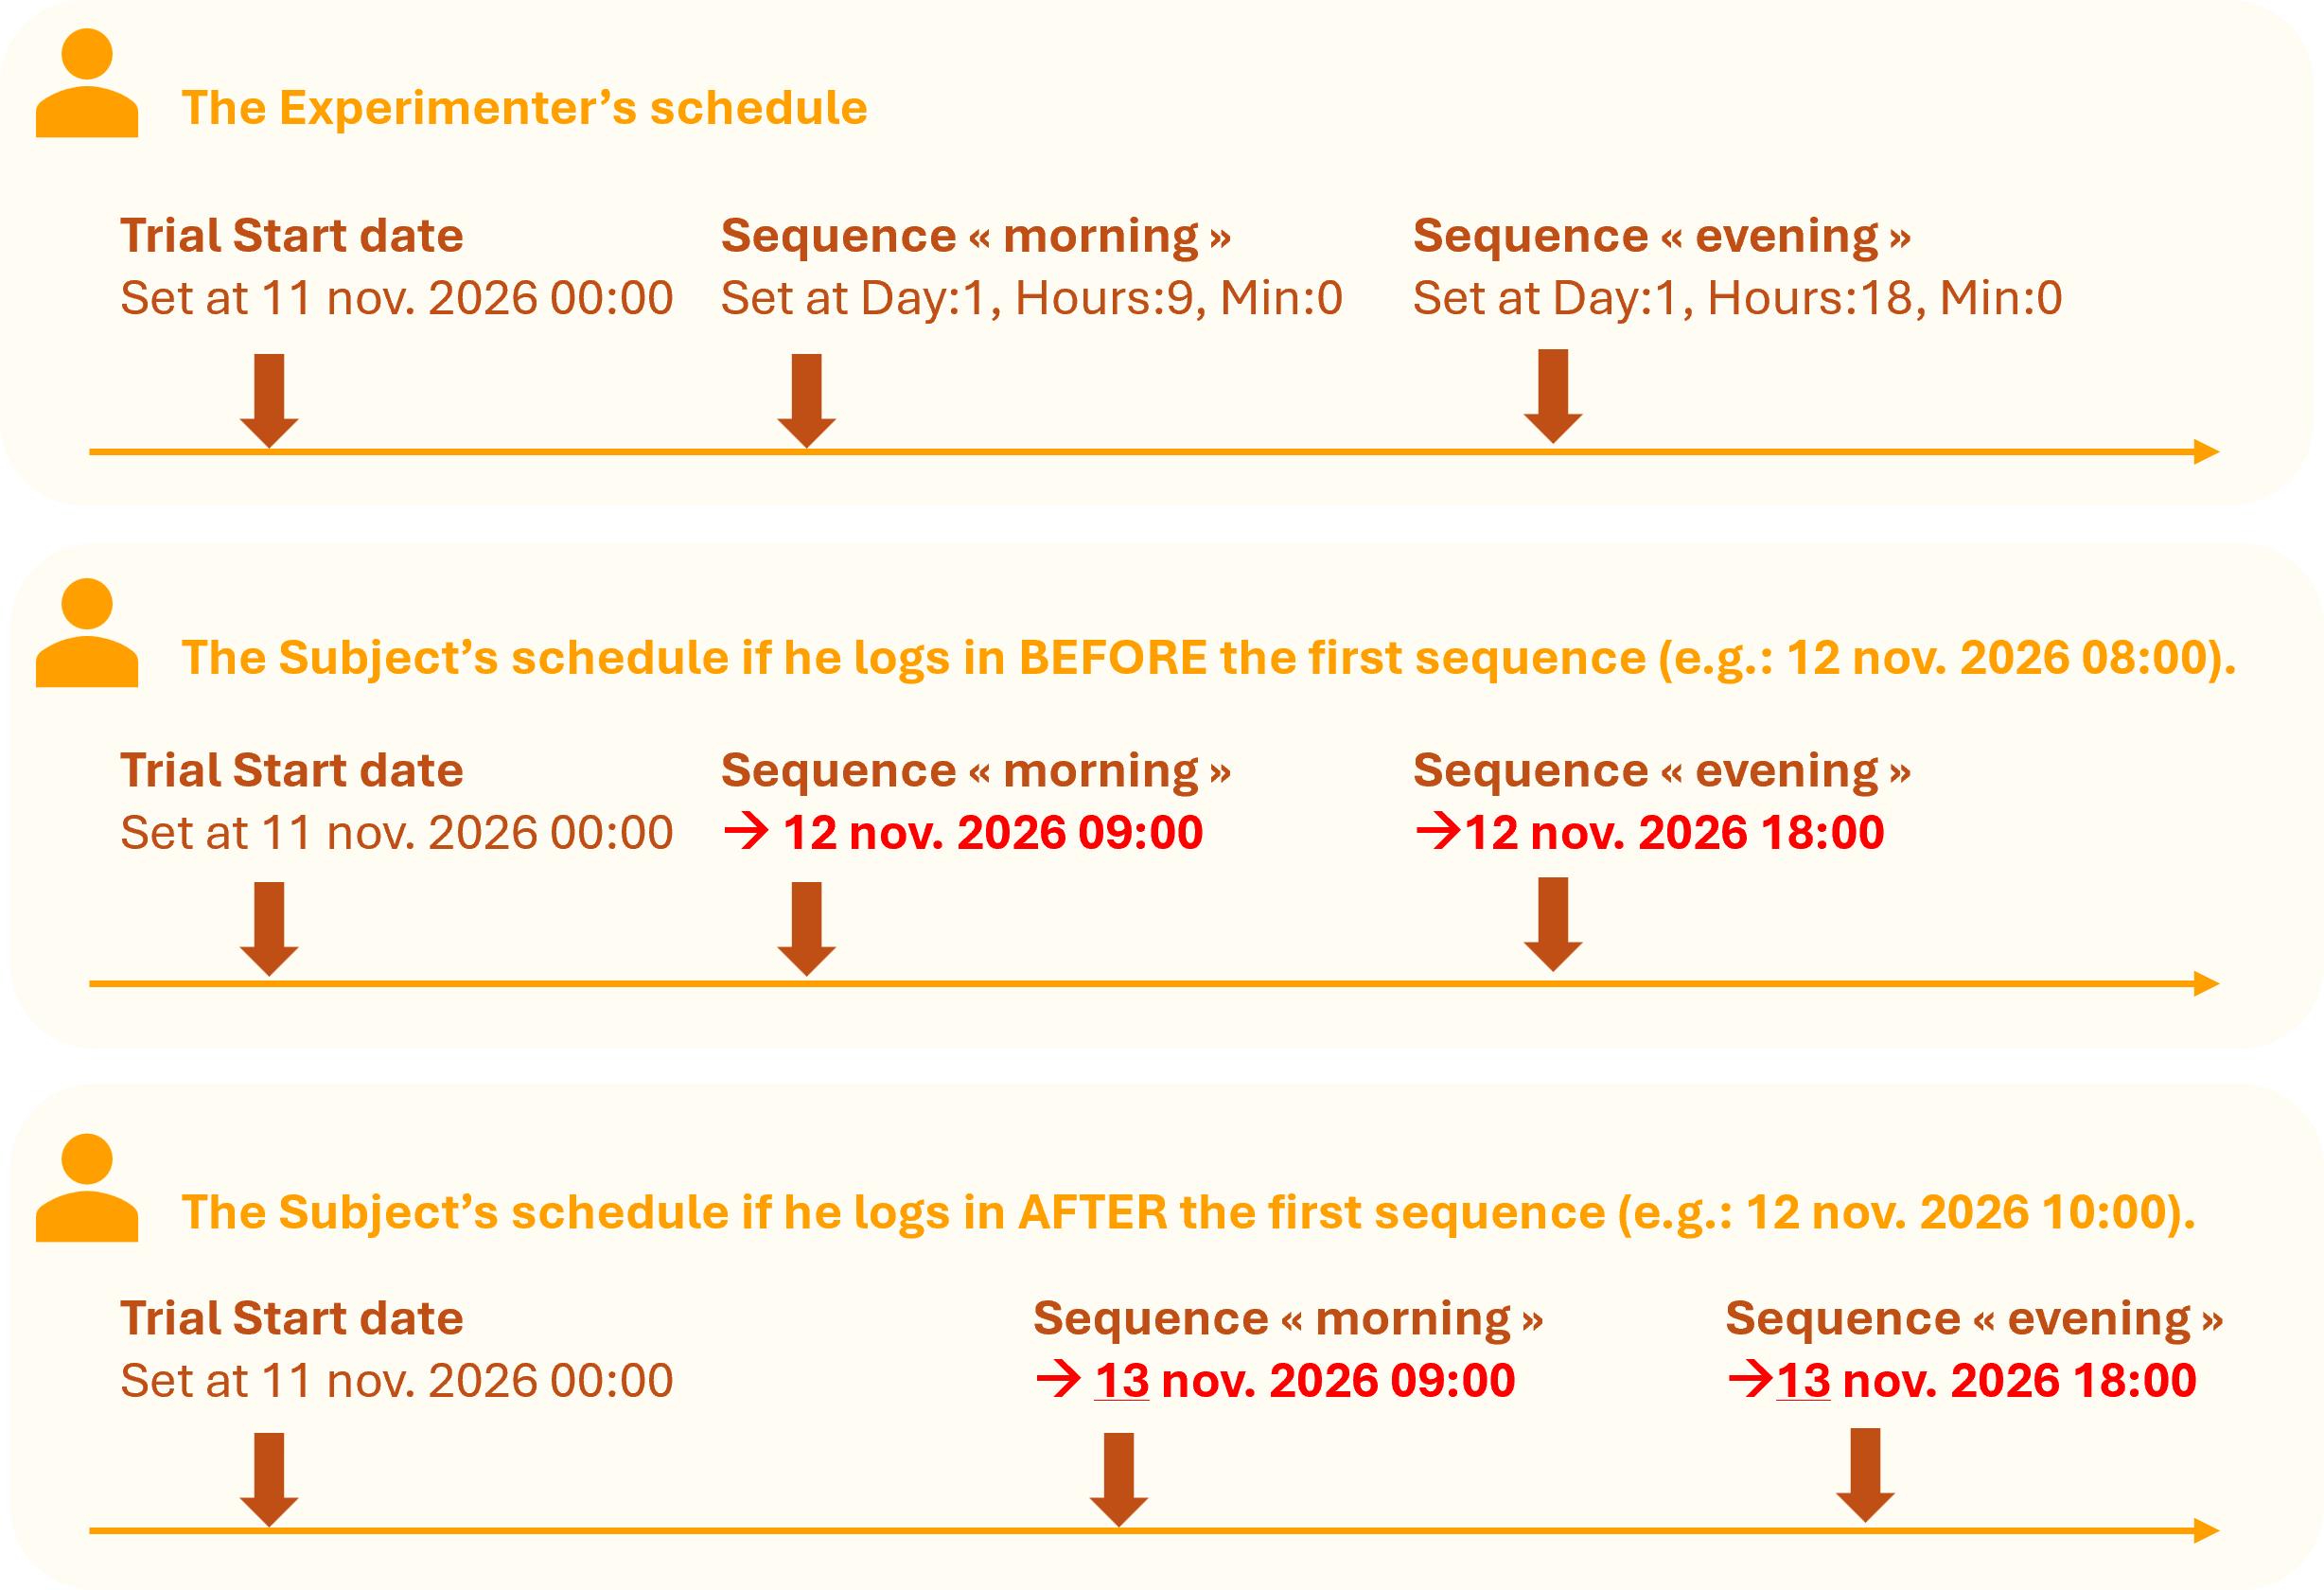
- Step 4 : Back in the [Schedule] tab, plan your sequences. Click the left arrow on a sequence’s tile and specify the number of days, hours, and minutes after the trial’s Start date (as set when the trial was created) when participants will be able to access the sequence.
⚠️ Caution :
If a participant logs into the trial after the date of the first planned sequence, that sequence will be scheduled for the following day , and all subsequent sequences will be delayed accordingly.
- Step 5 : Click the [Participants] tab and add at least one subject to your trial. On the right, you can view the subjects already created and associated with your Contextual Instruments environment. To add a new one, click "New Participant" and specify a username and password. Then, click the left arrow on the participant’s tile to include them in your campaign.
ℹ️ A participant is considered part of the trial only if they appear in the "Assigned Users" area.
⚠️ Caution :
The experimenter must send each subject their credentials .
- Step 6 : So far, the trial is in the Preparing status. Go back to the [General] tab and click the Start Collection button. The trial then switches to the Collecting Data status and becomes available to the participants assigned to the tria
⚠️ Caution :
When a trial is in Collecting Data state, it can no longer be edited or modified.