How to use measure with LIVE mode ?
Prerequisites
- Have familiarized with LIVE mode through the General Presentation section.
- Have subscribed to a Contextual LIVE mode offer and obtained your ID/password.
- Have Experimenter privileges.
- Have at least one compatible sensor.
- Have downloaded the mobile app.
Measure with LIVE mode
- Step 1 : Power on the sensor by pressing its button.
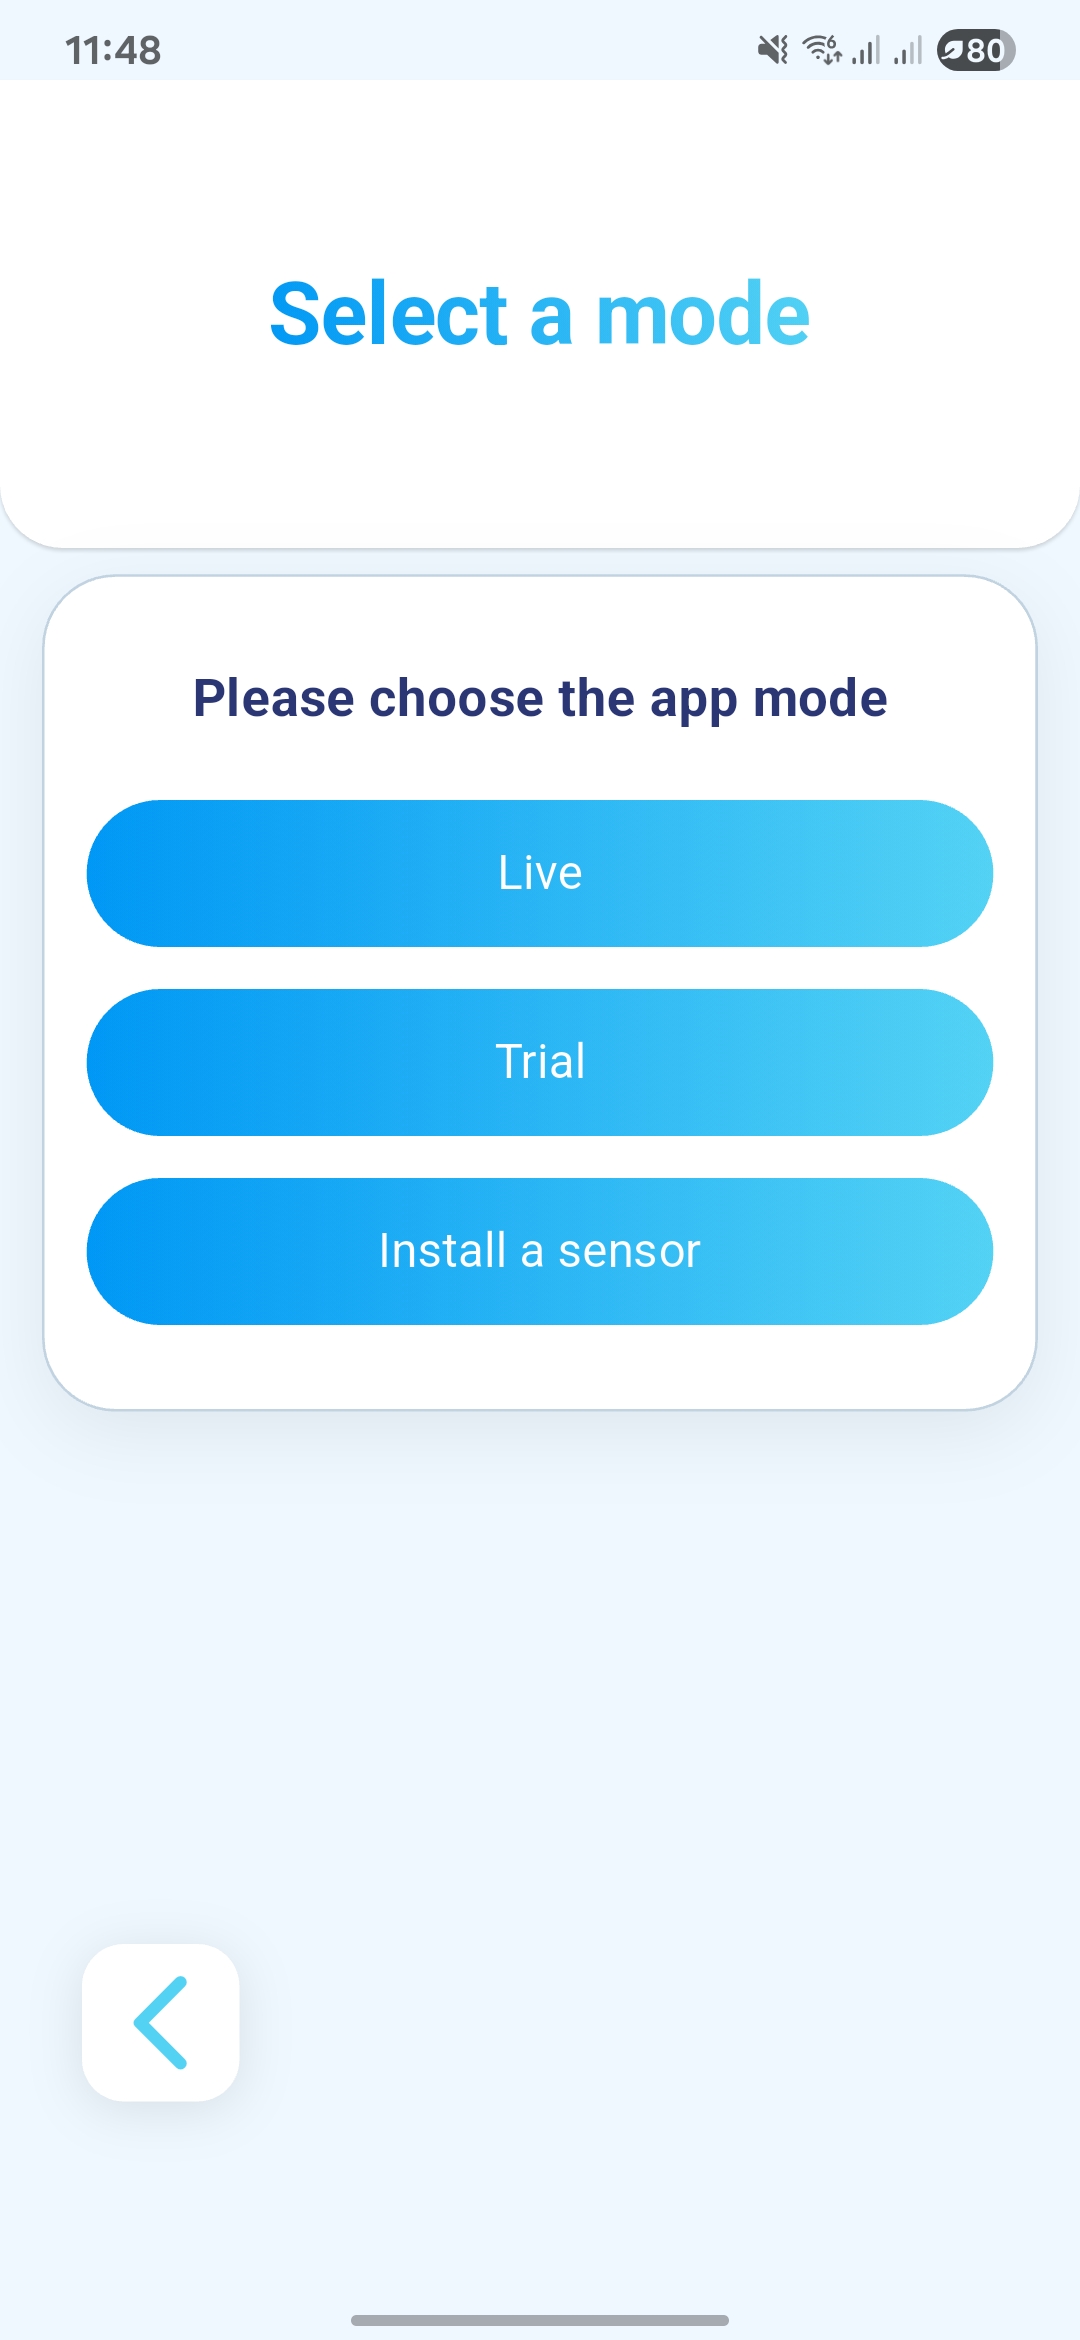
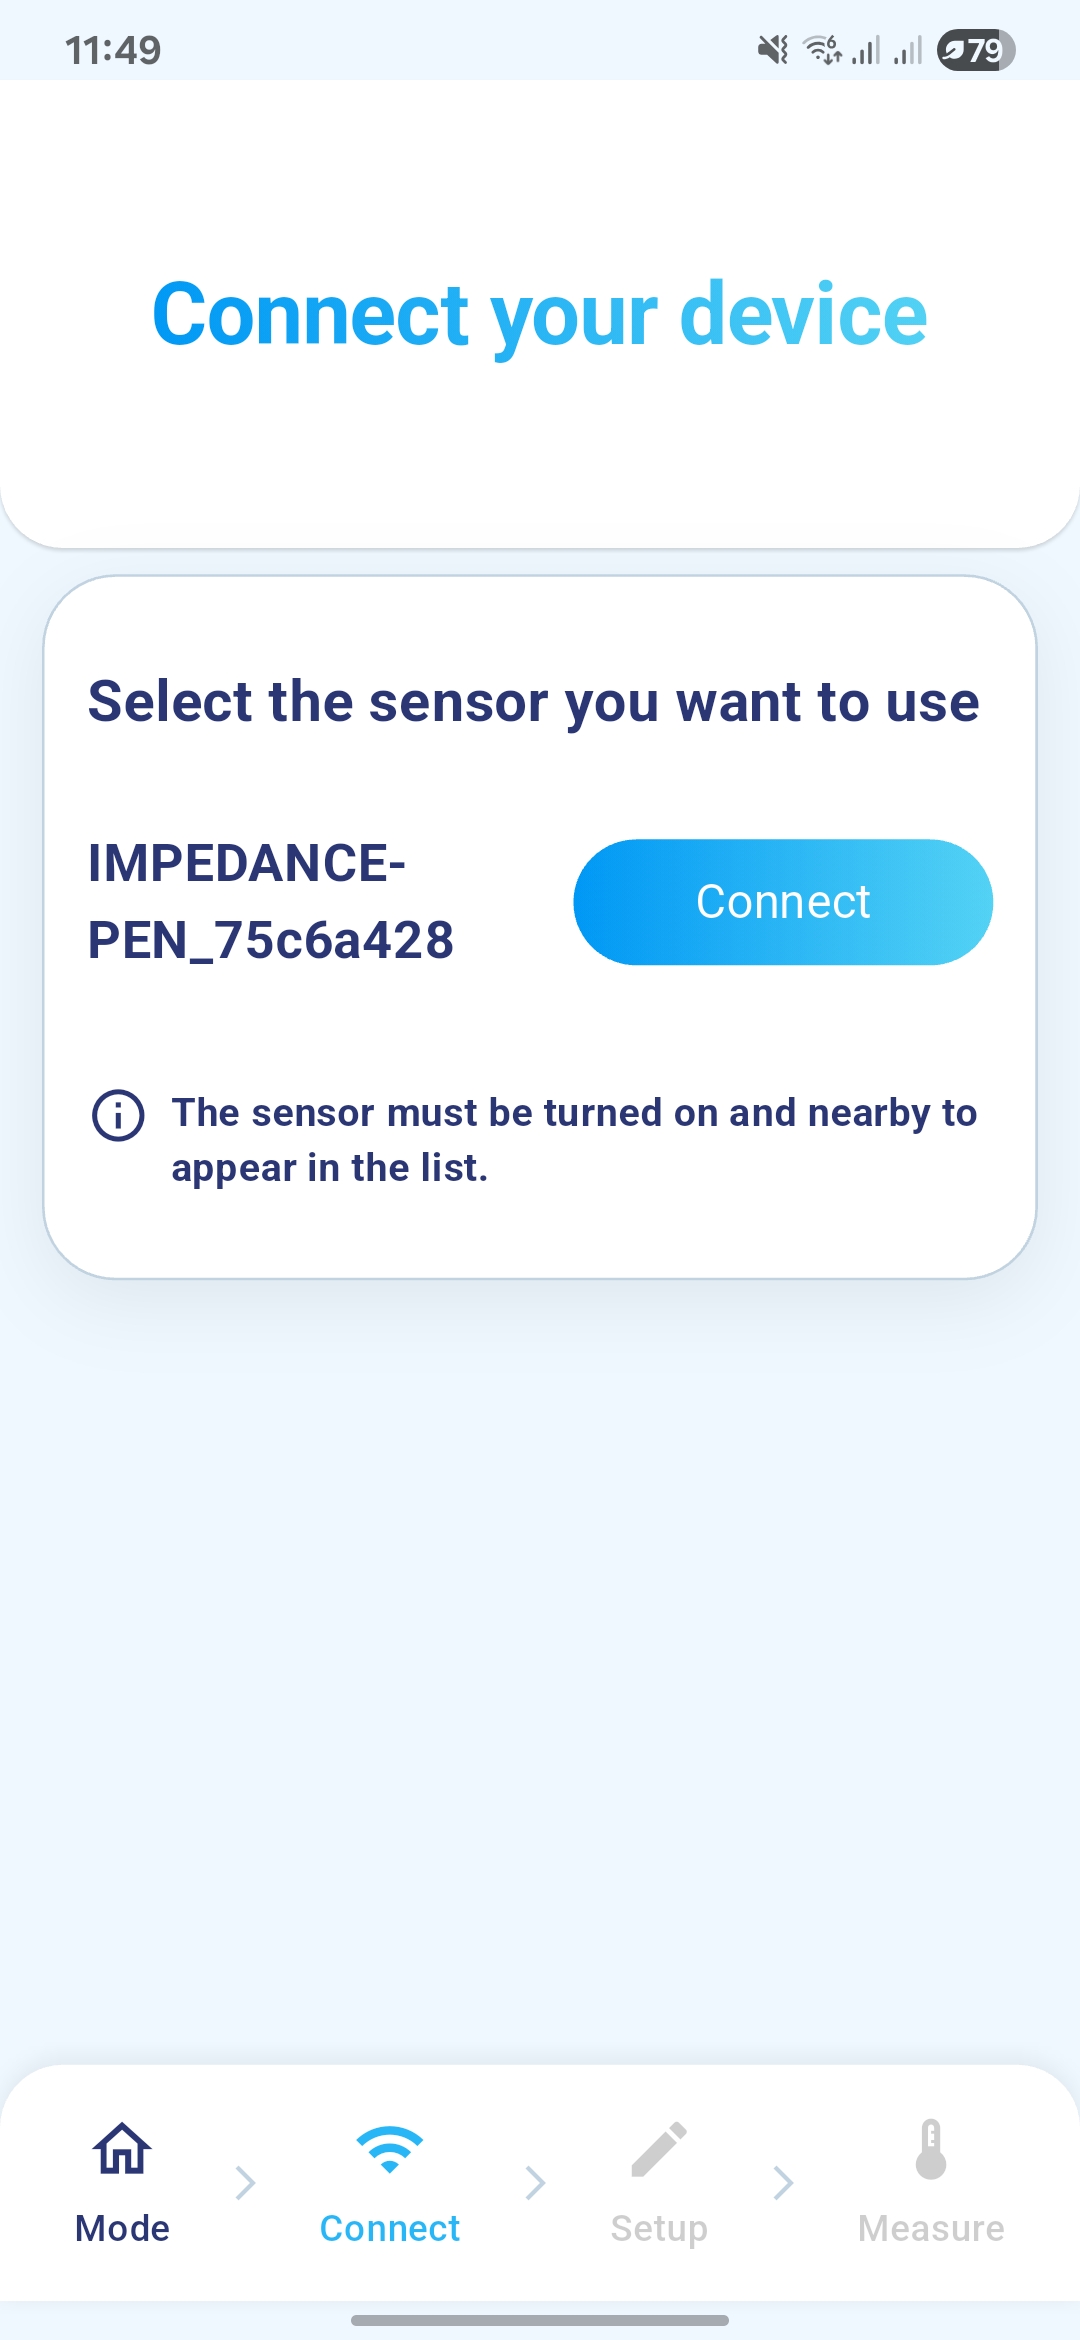
- Step 2 : Log in to the application, select LIVE mode, and connect your device.
 ➡️
➡️
 ➡️
➡️
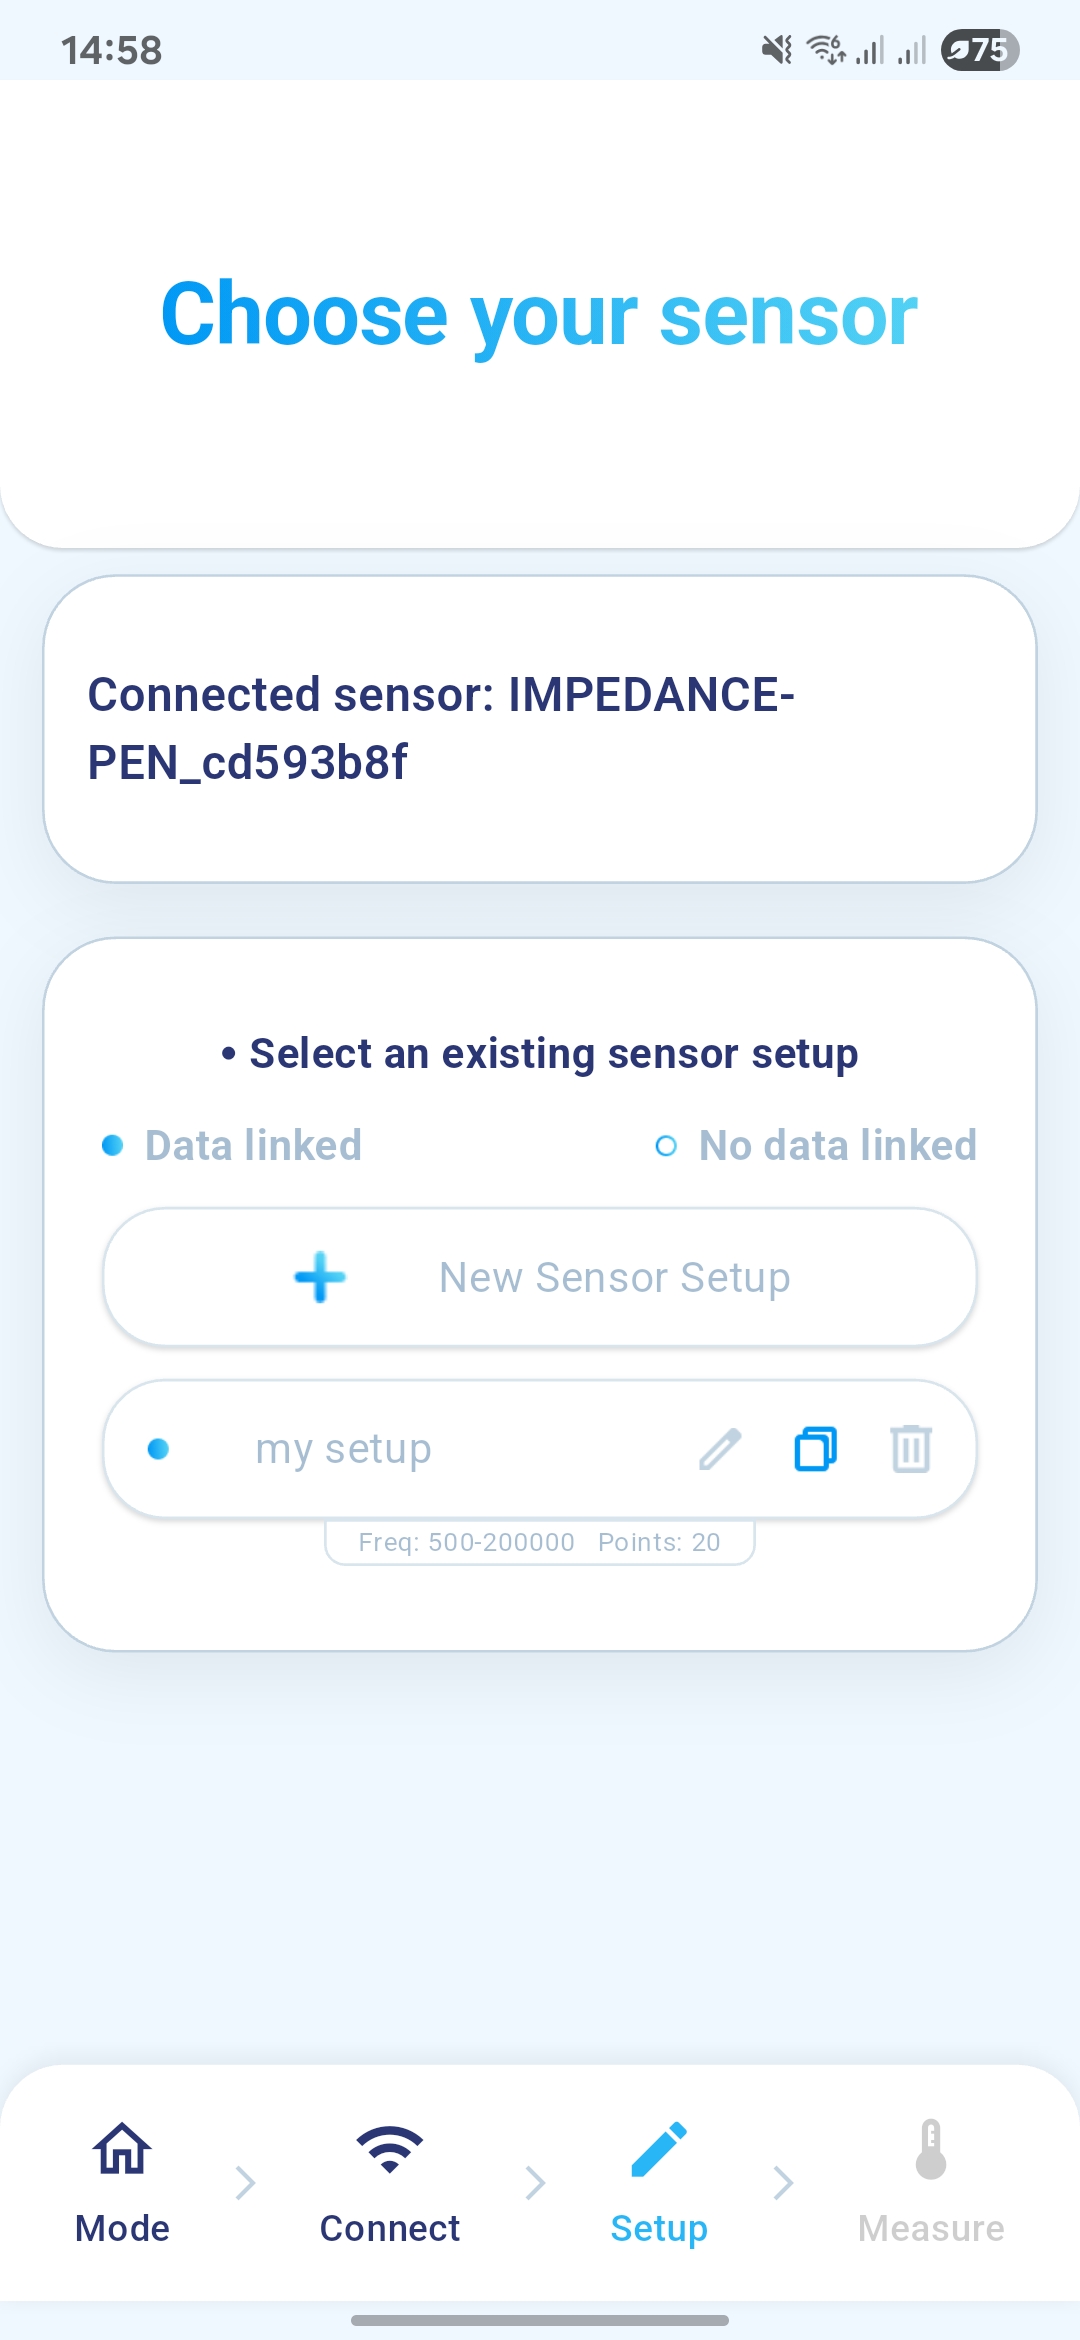
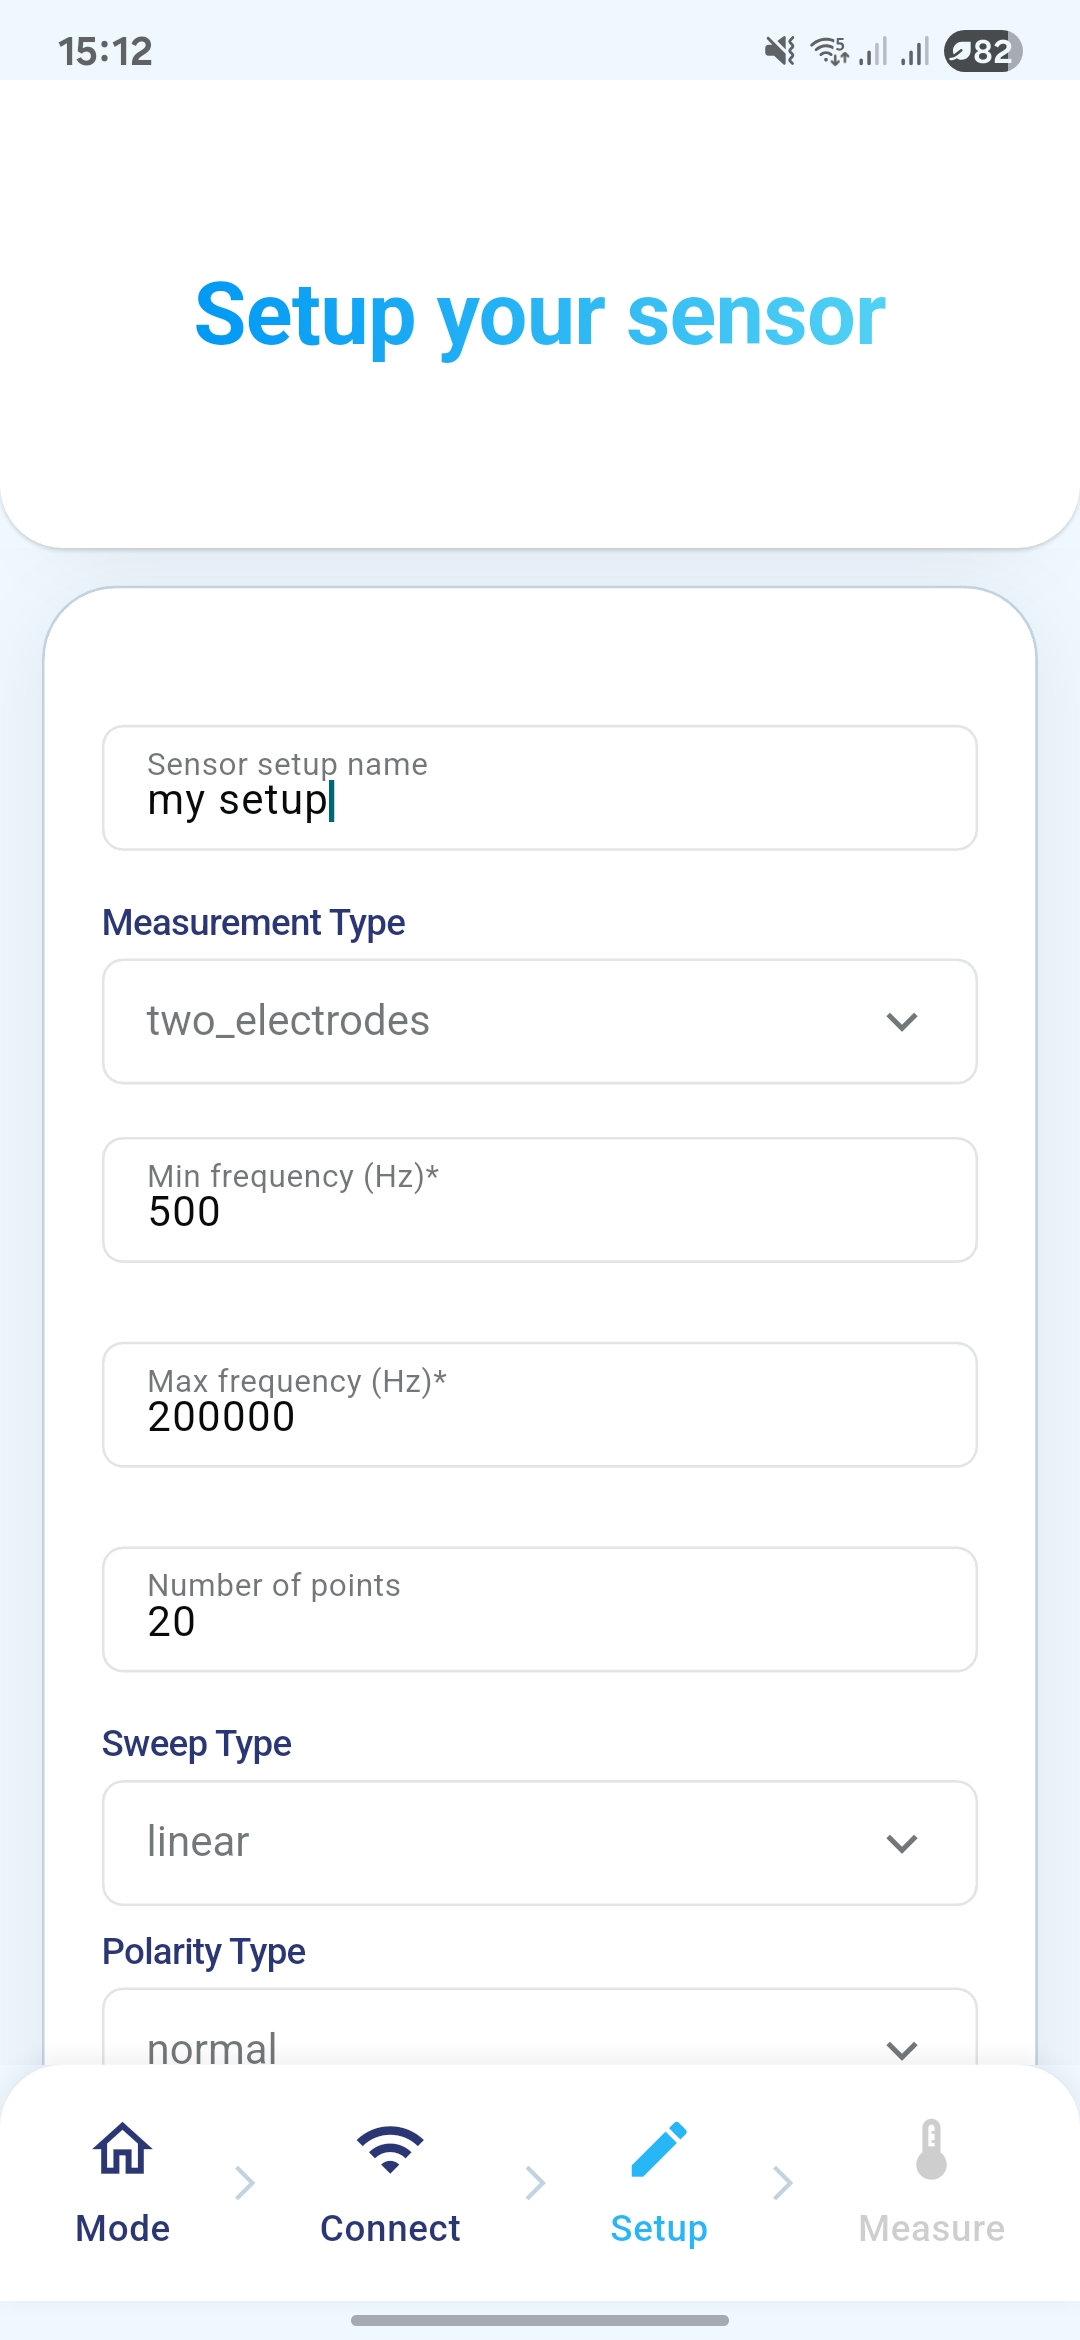
- Step 3 : Choose, modify, duplicate, or create a sensor setup. Adjust the sensor setup parameters if needed, and finally launch the acquisition. For certain sensors, a live stream of the acquisition is available.
 ➡️
➡️
 ➡️
➡️

ℹ️ If a Data linked blue dot appears to the left of the sensor setup, this indicates that measurements have already been taken using this specific sensor setup variant. You can either reuse it for a measurement or duplicate it to create a new variant based on it. However, the original setup cannot be modified.
- Step 4 : Observe your results. You can restart an acquisition, delete the current one, or optionally add notes. To save the data to the cloud, click the dedicated save button. You can to start a new measurement if desired.
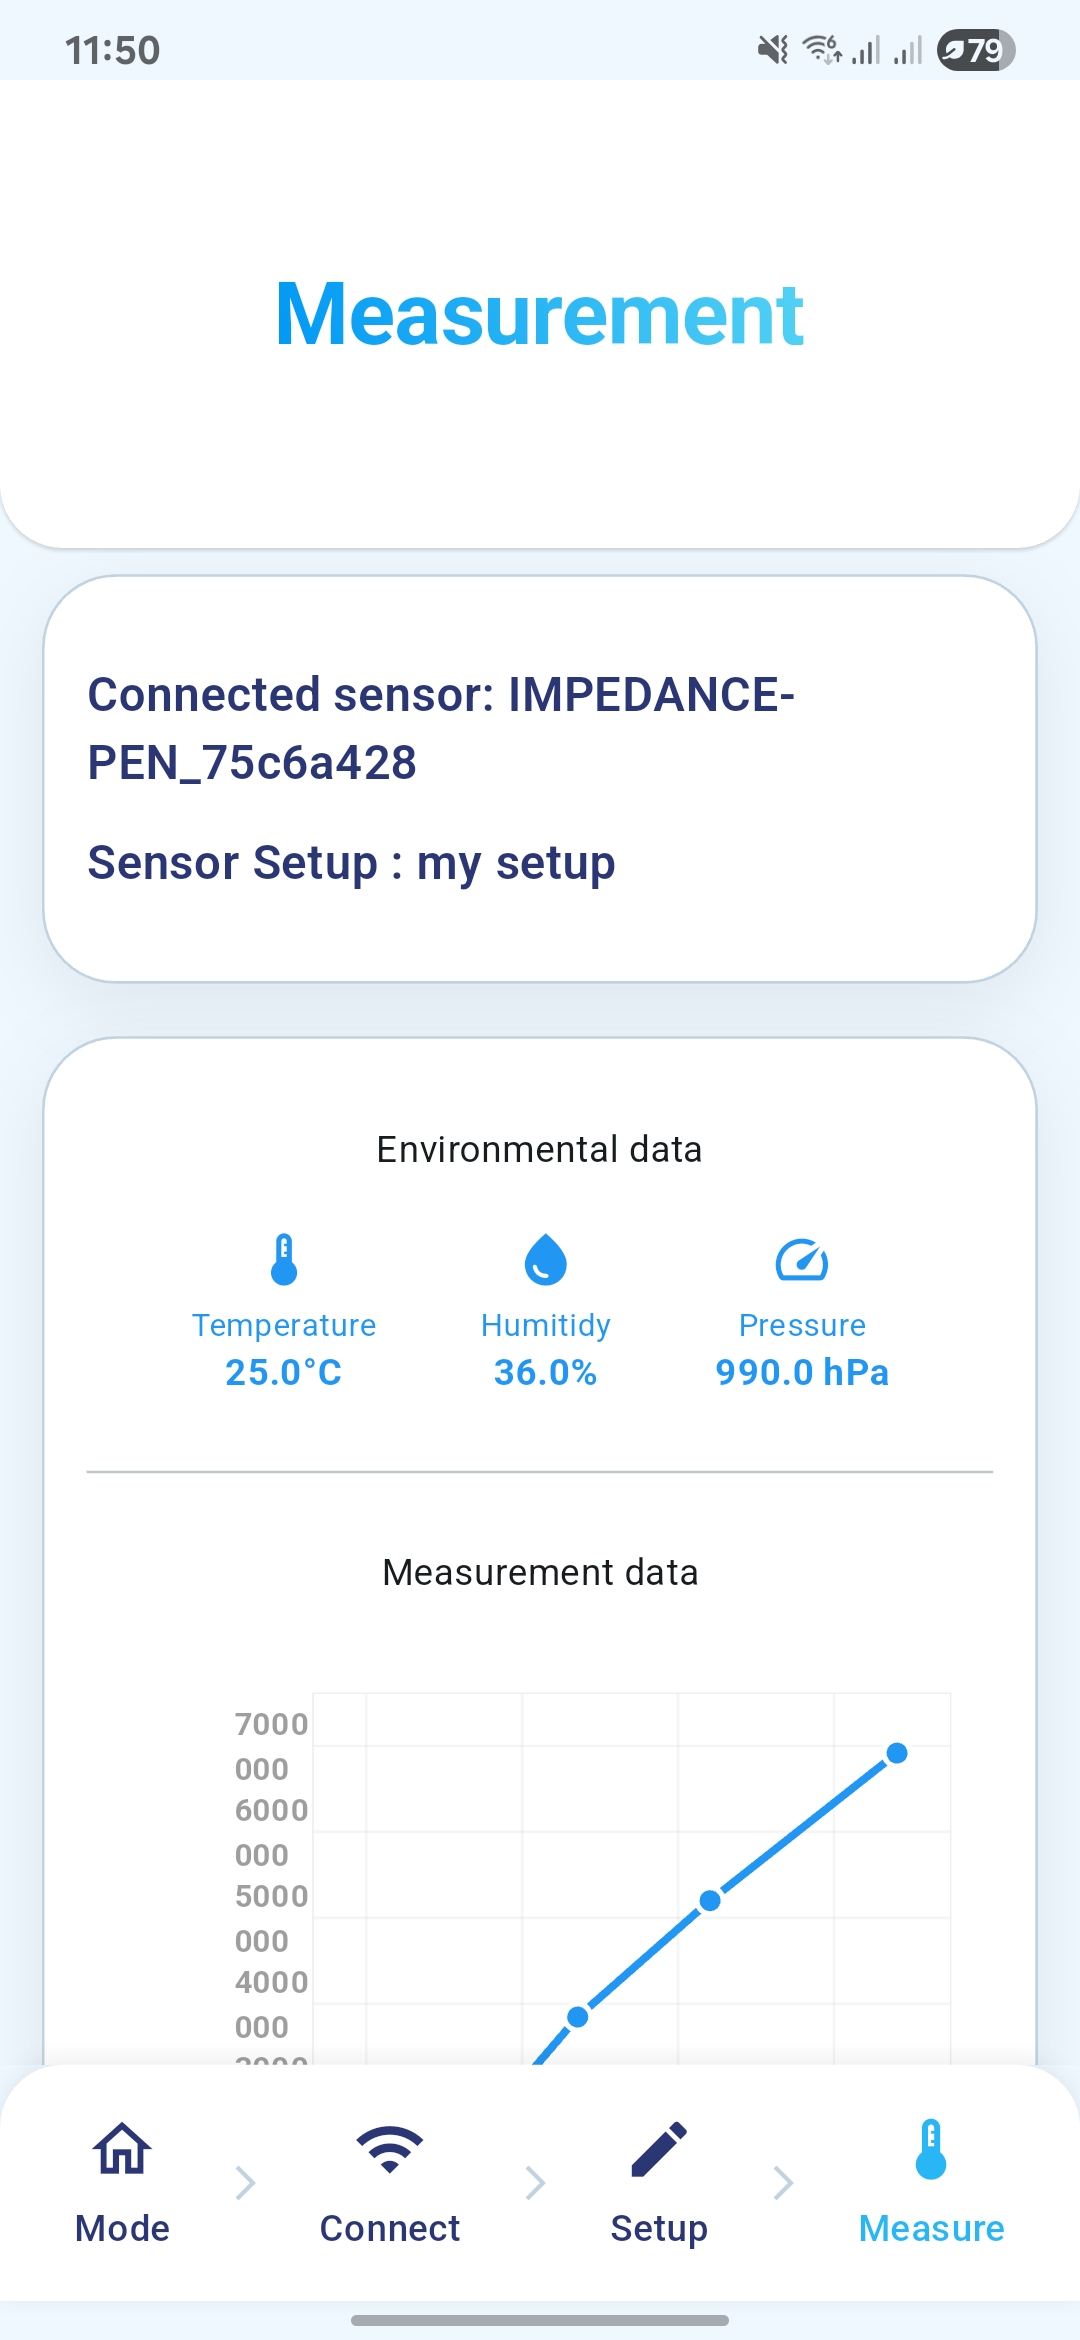 ➡️
➡️
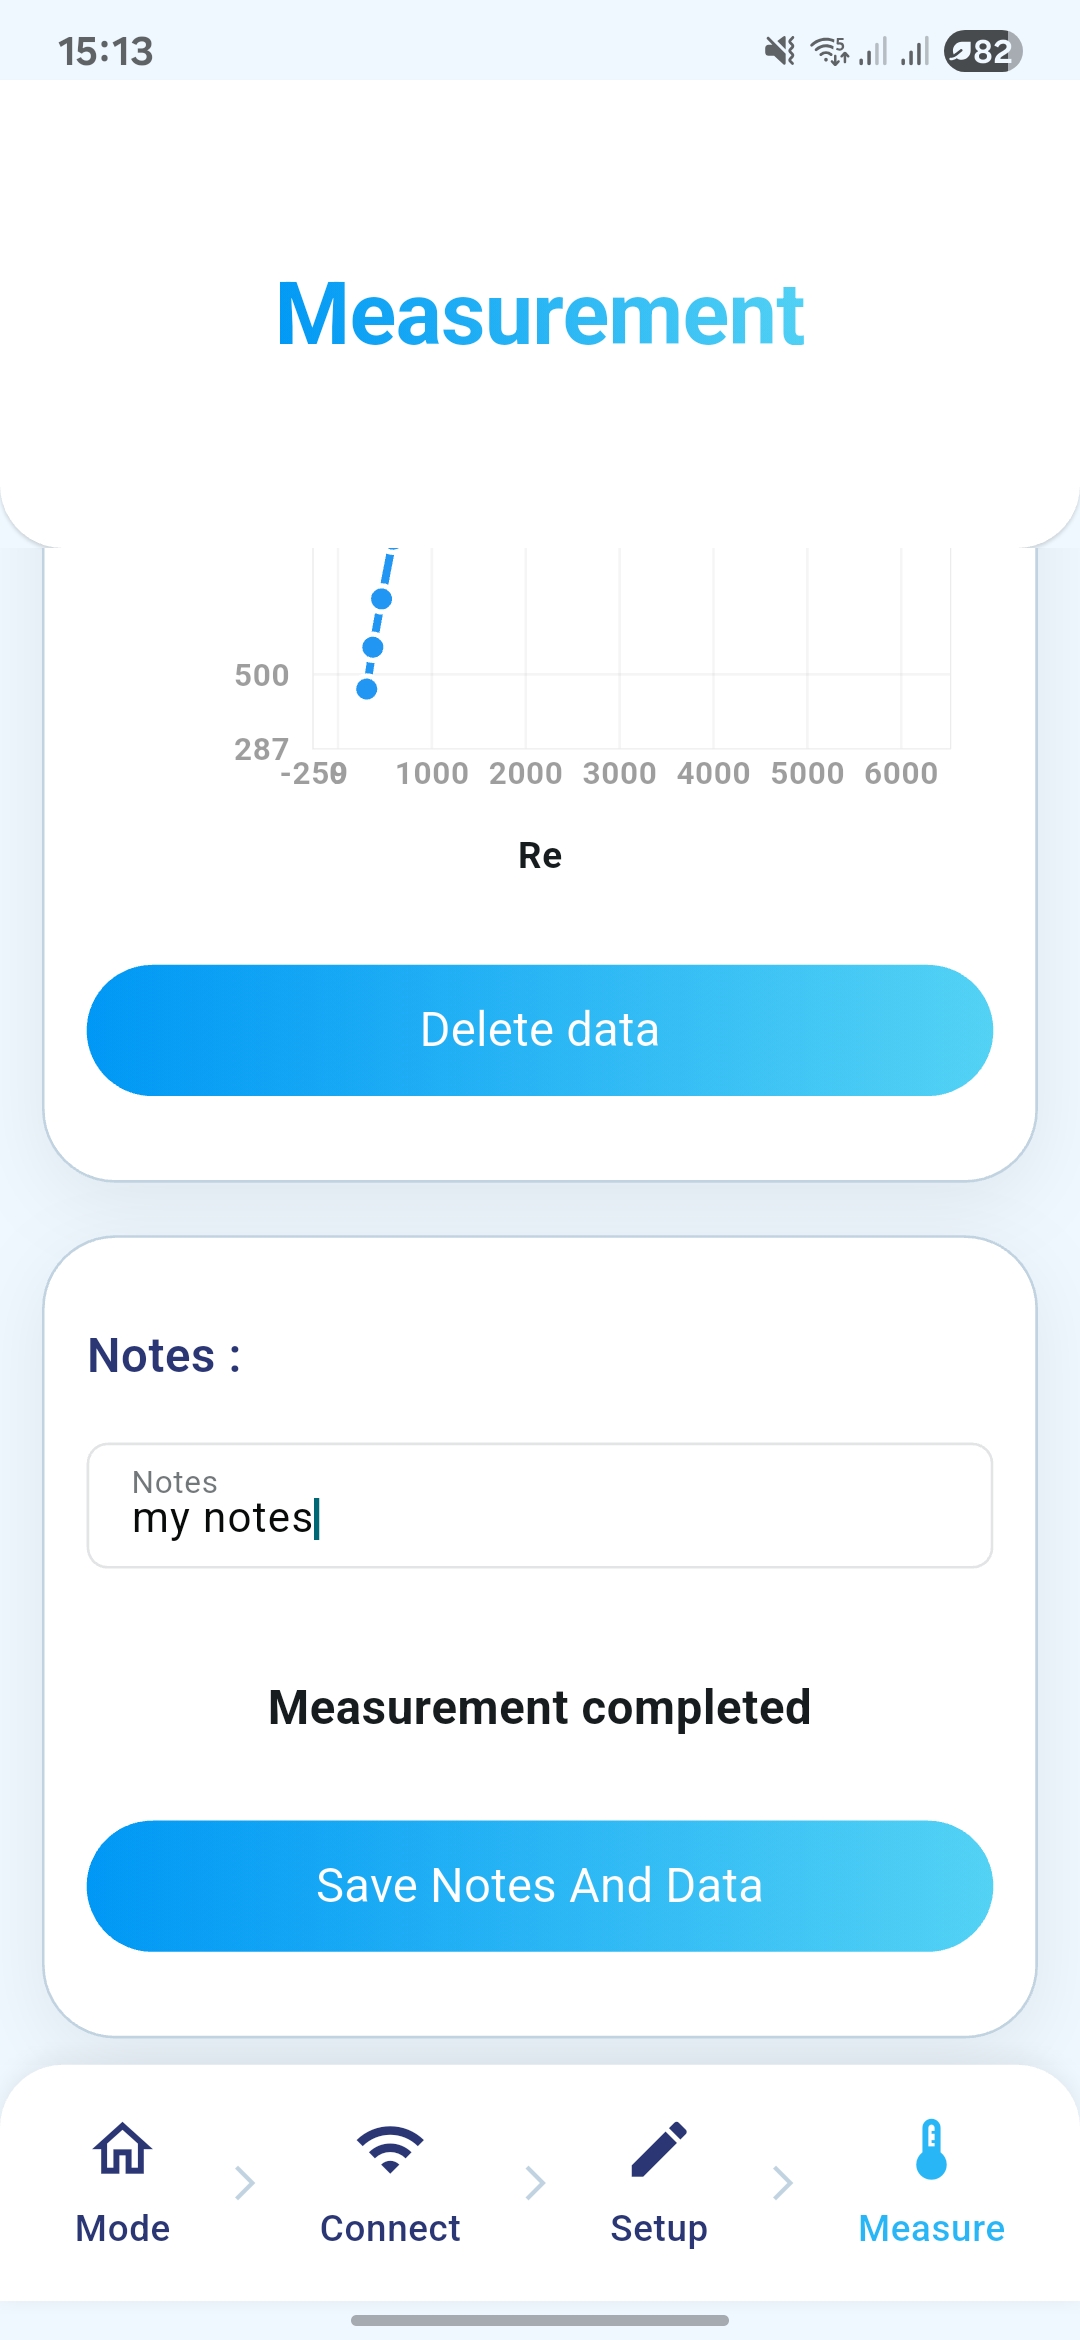
ℹ️ Notes field is an open space where you can enter any information to describe your acquisition (e.g., location, remark, or any other detail). This information will appear in the acquisition metadata on the platform.
⚠️ Caution :
Data are synchronized to the cloud platform only when you click the dedicated save button. If you do not, your data will be lost. A confirmation message will appear to indicate that the data has been successfully saved.
- Step 5 : After logging in to the platform, access the Live Mode panel. You can filter the data and perform the following actions for each measurement:

Download: Export your measurements as a CSV file. The content and structure of the CSV file depend on the sensor. Please refer to the corresponding sensor page for detailed information about the file format and data structure.

Visualize: View your data through a dedicated dashboard. The dashboard layout is specific to each sensor and is designed to present its data in the most relevant way.

Delete: Remove selected measurements from the platform. Please note that deleted data cannot be recovered.